...::: Life is Just Full of Colors :::...

Showing posts with label Masak-masaK. Show all posts

Friday, August 17, 2012

Biskut Dahlia a.k.a Semprit

Lama tak ber'blogging'..terasa hati nak mengabadikan sesuatu dalam nurkilan sepi niii (yang dah menyepi sekian lama) supaya tak hilang..ni kan ala-ala buku rujukan aku..hiks..

Actually nak simpan resepi biskut dahlia yang aku buat mlm tadi menjadi seperti yang diharapkan...Mak buyung berkepinginkan nak makan biskut semprit yang sedap dan gebu cair di mulut tuu..tapi provided takmau yang 'tunjuk-tunjuk'..nak yang hasil tangan sendiri punyaa...

Hasil dari google2 ke segenap ceruk blog dan sharing dari kawan2..maka terhasillah akhirnya apa yang menjadi ke-mengidam-an aku menjelang eidulfitri nii..Tadaaaa.....!!!!

Biskut dahlia a.k.a biskut semprit kegemaranku dulu..kini..dan selamanya..

OK..hasil dari kajian yang dah dibuat dan kompilasi bahan yang aku tambah tolak sendiri..maka dapat laa mcm yang kat tas niii...dan meh sini nak share buat tatapan dan rujukan kawan2 semua.. :-) pada tuan punya blog yang aku pon dah tak ingat banyak sgt aku buat sumber rujukan kajian nii..mohon halal yaa...moga makin bertambah murah rezki kalian..Aminnnn...

Ingredients:
225 gm of butter (I used buttercup)
110 gm icing sugar
2 biji egg yolk
1/2 tsp rose essence
70 gm corn flour
120 gm custard powder
170 gm flour
egg yolk color (2-3 drops)
red cherry (tiny cuts)

Instructions:

  1. Finely mix butter and icing sugar
  2. Add in the egg yolk and rose essence and mix them finely again.
  3. Sift all the flour together and mix into the mixture little by little.
  4. Press dough into pan using molds.
  5. Heat the oven at about 10 minutes
  6. Bake them for 20 minutes at 160 degrees.
  7.  Cookies are ready to be store when they are turns cold in room temp.
Selamat laaa mencuba buat semua yaa...
~Salam Eidulfitri..Maaf Zahir Batin~

Happy baking peeps.. ;-)



Sunday, December 11, 2011

Apam Polka Dot

My very first try to make this apam polka dot and I did it even the shape doesn't turn out up to the expectation but the looks doesn't tells the real taste I bet you..hihi...in anyway..I will always to give a very high credit to myself..Anak pun ulang makan tak berenti...Proud to be as I am..hahahahaa...

OK..jom mula cerita apa kisah di sebalik the insist-ness nak sangat buat apam polkadot nii...First of all..tengok ramai yang buat nampak mcm senang sbb main kukus2 jaa..rupa sedapp plak tuu..I always like to terjah when it comes to the simple simple one.. ~padan muka aku..tertipu~

Second is...aku tengok rupa dia comel-comel sangat, sampai teruja nak jugak buat sendiri..sebab kalau order macam tak puas hati perut punya lahh..

The third, anak duk tunutut berhari2 dah..sampaikan dua tiga hari bila bangun dari tidoq pagi2 tanyakan apam polkadot..so hari ni buat jugak! chaiyukk!!

The fourth...incik hubby kata lama tak nampak pakai mixer dia beli tuu since the very last time is masa buat kuih raya bulan posa hari tuu..hihihii..apa ke tidaknyaa..kek moist brownies aku yang org duk gila pesan skrg tak payah guna mixer..unless laa kalau ada org pesan ciskek, maka akan berkhidmat laa jugak mixer tuu..in anyway..I love you to the bits my dear Mr. Hubby for all your none-stop support..mmuahhss..

Woi woi woi...banyak pulak cengkadak hang duk merepek sampai nak jiwang2 plak dah niii..resepi tak kluaq2 pun lagi..ok ok...here you go..aku blajaq buat punn dari sini jaa...apa2 pun nak ucap tima kasih sayang yang tak terhingga kat CikTom..mintak halal laa erkkk resepi nii...hihi..moga makin murahhhh rezki cik Tom..aminnn..
Walaupun tak semenggah rupa..janji sodapp...

Bahan-bahan (utk ~50 biji apam polkadot cup 1.5")
  • 3 biji telur gred A (dari peti sejuk)
  • 275g tepung gandum
  • 220g gula halus (aku guna gula castor 200g ja)
  • 150ml susu segar/cair (aku guna susu cair)
  • 3 sudu teh baking powder
  • 1 sudu teh 'ovalette'
  • 1 sudu teh esen vanilla
  • Blueberry filling ( nak guna strawberry/kaya/etc pon boleh)
Cara-cara nak buat:
  • Pukul telur dan gula castor pada kelajuan max sampai kembang, gebu dan putih melepak
  • Masukkan susu cair, tepung gandum yg diayak bersama baking powder, ovallette ikut turutan, mix sampai sebati. Kemudian masukkan esen vanila, dan mix lagi sampai sebati.
  • Bahagikan adunan kepada beberapa bahagian, warnakan ikut warna kesukaan, kemudian masukkan adunan berwarna tadi ke dalam piping bag.
  • Paipkan adunan ke dalam mangkuk kertas hinggap aras separuh, kemudian masukkan filing (piping is the easier way) kemudian paipkan lagi adunan sehingga hampir penuh paper cup tuu.(boleh guna warna yang berbeza kalau suka a.k.a kalau rajin)
  • Buatkan dot-dotnya.
  • Kukus pada api sederhana selama 15-20 minit atau sampai masak laa menda alahnyaa..hihi..
  • Siap..!! Tadaaaaaaaaaaa....!!!
Berasak-asak laa dalam tray nih dek takder tray utk letak cup tuu satu-satu..
Tu pasai tak bulat...hahahahaa..but dapat laa dua tray nii plus 'cup malas'
 yang kat bawah niii...


Cup-cup yang gabak ni gara-gara dah malas nak piping masuk dalam cup kecik2 tuu..
Plus masa dah tak mengizinkan, sbb nak pi USM, ada briefing pasal Danish nak masuk skul.

Dan ini adalah habuan yang dah di-ngap! oleh si kecik aku..Nampak sangat punya excited
lepas menahan hasrat berhari-hari lamanyaa..hahahahaa...Ni round satu..siap tapau lagi bawak pi USM..Dan balik pun duk ulang lagi...kagum mak..!! :-)

Ok peeps, have fun on baking as I do since it's really make me feel good..Hilang stress haku kalau layan baking activities just like all these..

Cheers;


Saturday, November 5, 2011

My First Ever Attempt in Chocolate Paraline

I had a sooooo much in desire to make chocolate paraline by my own rather than just only ordered from friends. I did google around with the information but only as usual when it comes to the matter of time, thing been delayed and delayed.

And come to this good thing of me, nak jugak buat and therefore I came across with this stuffs first before I started all over the task..Since I always have too limited of time to go all the way to the store and find for the molds, I turn out with online shopped..takpa laa mahai sikit but at least cover laa jugak duit petrol and masa aku..hihi..


Got these from here and I bet you could get anything as your needs in baking from them..It's easier...no need to think when and where to go and find them..

Mainan masak-masak aku..yeayyy!!! boe start dah...!!!!

And tailing from having these stuff in front of my eyes...I made up my mine and my time with my little guy doing this, and here you go the outcome even though still lacking in many areas..but in my case, at least I got to know how the process goes to make it.. :-)

Friend suggested to use Collata compound milk choc but since Collata milk choc asyik habihh jaa..
So I turned my mind to choose other brand..apa nama ntah tak ingat but it tasteway better than Collata..

Please disregard the lubang-lubang bubble due to unwell melted compound chocolate.. :-) so hopefully lepas nii tau dah where to correct..and where to improve..All in all..sedapppp!!!! Itell youuuuu....

Way to do it, simple! you may want just to melt the milk choc until well melted, then pour or piping them into the molds as you like...E.A.S.Y..!! Have fun to try... 

Cheers ;-)


Friday, October 28, 2011

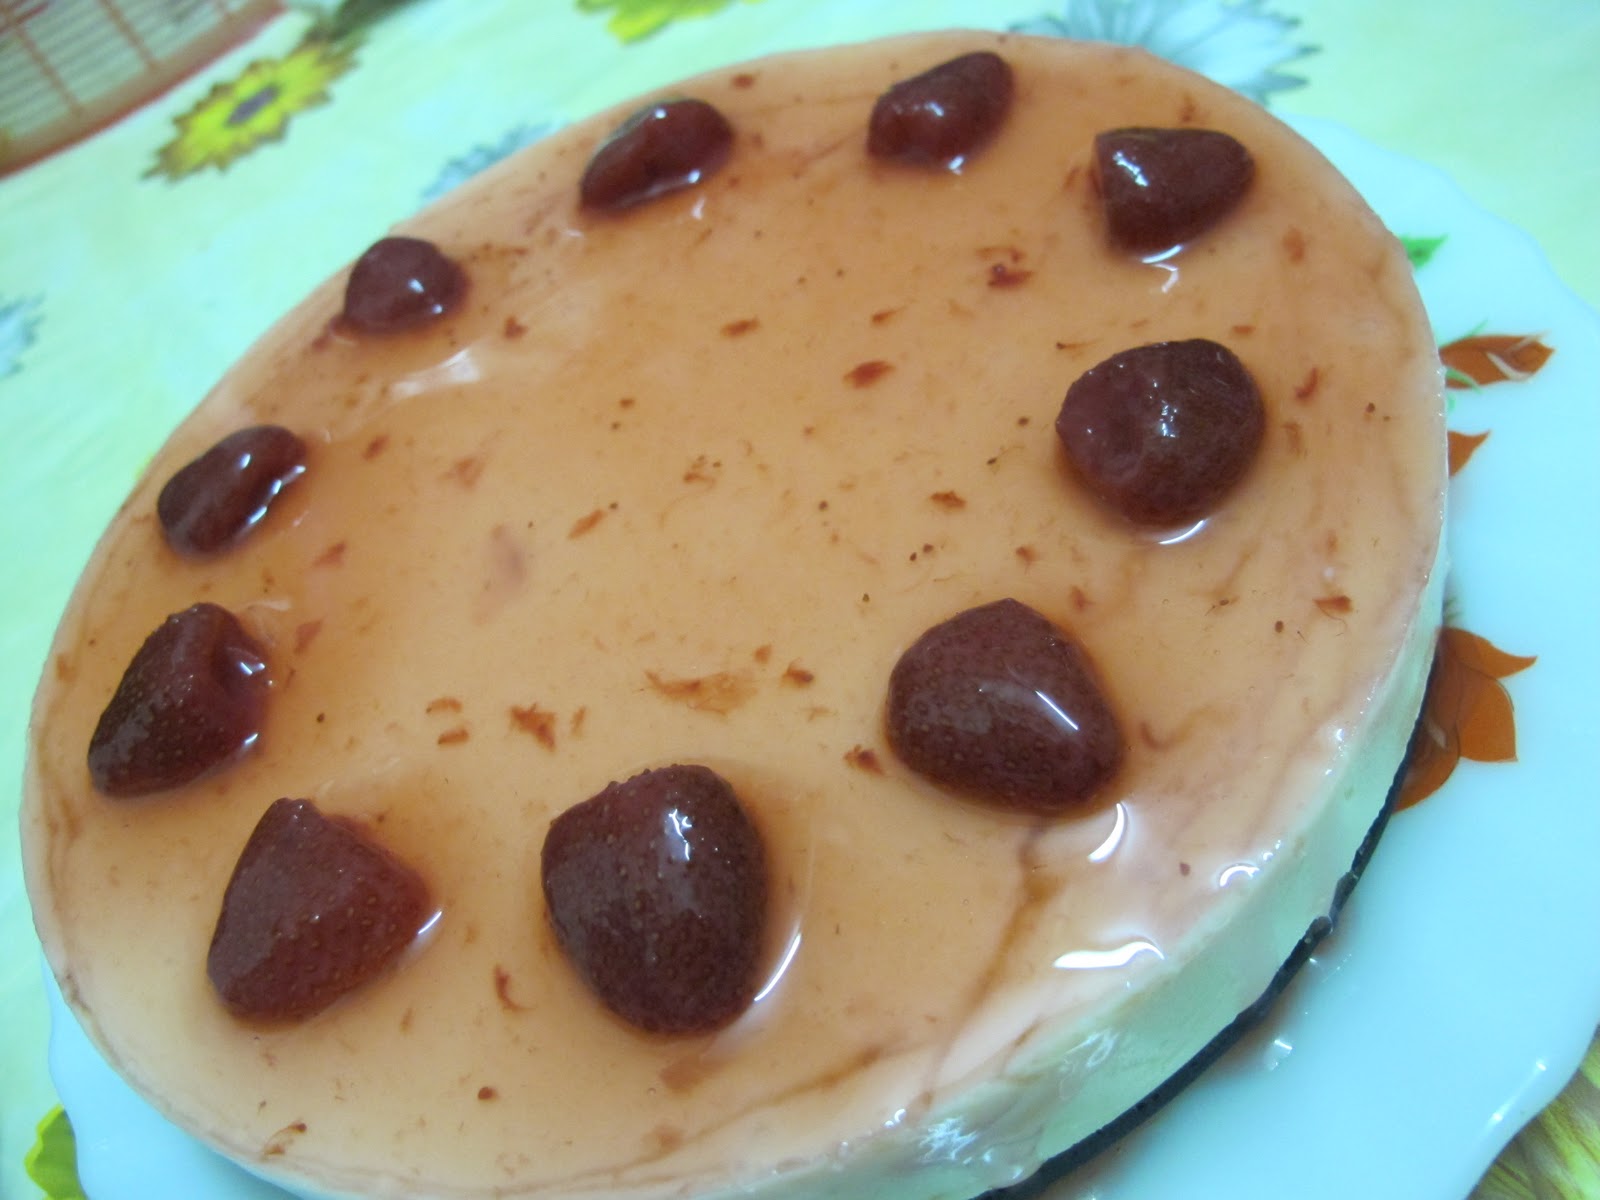
None-Baked Strawberry Cheesecake

Recipe inspired from my 'reference book' here, but the looks and taste I bet might be different lah kann..lain-lain tangan..appropriate laa to me as a first timer on making it..And please..please and please believe me it was sooooo yummy I tell you...

Previously, I was done with this simple one, and now following with this one which is none-baked. Friends were advising that none-baked one is way easier than the baked cheesecake..as at the first place before making it, I felt that terribly lack in confidence..apa laa pulak rasa satgi kek aku nii kalau tak bakaq but it turned up so great till I can't believe that I made it..!!!

And here I share out the recipe..to Kak Hana di kejauhan sana..mintak halal erk ilmu masak-memasak nii...makasihhhh... :-)

My None-baked Strawberry Cheesecake
Ingredients:-
To my niece, recipe must be in Malays kan..there you go the motivation..kalau tak buat jugak siap laah hang.. :-P

Bahan untuk based/tapak kek

  1. 15-20 pcs biskut Marrie (Blend halus)
  2. Buttercup (1/3 - cairkan)
Mix those above ingredients well, then tekan rata dan padatkan ke dalam pan (I used 8" loose bottom pan). Bakar dalam oven at 180 degrees for 15 minutes. Ketepikan biar sejuk..

Bahan unuk kek:
  1. 200ml whipping cream
  2. 50 gm plain yougurt
  3. 250g cream cheese
  4. 150g gula castor
  5. 2 sudu makan jus perahan lemon
  6. 10gm gelatin halal (I used gelatin from Halagel)
  7. 100ml air mendidih (untuk cairkan gelatin, atau boleh cairkan guna method double boiler)
  8. 3 biji Fresh strawberry (dipotong dadu, jgn besar sgt nanti habis semua tenggelam ke based)
  • Pukul whipping cream sampai nampak putih gebu..ketepikan
  • Dalam bekas yang lain, pukul cream cheese dengan jus lemon hingga sebati, tuangkan gelatin yang telah dicairkan dan kacau hingga sebati.
  • Tuangkan ke dalam bekas berisi whipping cream tadi, sebatikan. Jangan pukul guna mixer sbb nanti habis terpercik satu meja.
  • Tuangkan separuh adunan ke dalam loose pan berisi biskut tadi, kemudian taburkan fresh strawberry, dan tuangkan sehingga habis adunan kek
  • Masukkan ke dalam peti sejuk semalaman. (Kak Hana kata dia masukkan 2 jam jer but I left it for more than 4 hours sebab pegi jenjalan ke shopping Mall dulu pastu balik sambung lagi...aci tak gituu..?? :-D)
Bahan untuk topping:
  1. 150ml strawberry filling with strawberry inside
  2. 5gm gelatin halal
  3. suku cawan air mendidih
  4. 2 sudu makan gula pasir
  5. sedikit pewarna merah (aku tak letak, sbb tu topping nampak transparent..sexy gituu)
  • Cairkan gelatin
  • Then masak semua bahan kat atas nii sampai jadi bebetul pekat (sblm tu asingkan strawbery-strawberrynyaa dulu) - padahal aku tak masak pon..main campur jaa semua bahan dengan air mendidih
  • Sejukkan dan tuangkan ke atas kek yang dah disejukkan berjam-jam tadi..susun strawberry yang diasingkan tadi ikut suka hati..


Happy baking...
Cheers ;-)


My Very First Egg Tart Ever

I was taking quite a long minutes to get started on blogging again since my very last entry..Yes it is almost a month passed by and due to the matter of time...I had my home being abandoned for quite some time..Well, here it start again..hmmm....huhhhhhh....~breathing in and out~

OK...as per requested by my niece to write this recipe in Malays..so I make it for you Dear starting from now on since this tags will become your reference book of cooking and baking...no harm and nothing scathe for sharing the knowledge..Here you go!

My very first attempt of Egg Tart


Resepi Tart Telur (inspired form MyResipi):
For pastry
  1. Buttercup (belah dua, ambik sebelah jaa)
  2. 80g gula ising
  3. tepung gandum (secukupnya smpi boleh uli jadi doh)
  4. 1 biji telur
  5. 1st esen vanilla
For filling (ikut sebijik-sebijik kat sini)
  1. 1 cawan susu cair
  2. 4 biji telur
  3. 1 cawan gula (kalau taknak manis boleh kurangkan)
  4. 1 cawan air
  5. 1 sm tepung kastard (bancuh ngan sikit air suam)
  6. 1 st esen vanila
  7. sedikit pewarna kuning (tak letak sbb kustard dah kuning)
Instruction of preparing:
Ehh silap...cara nak buat:
  1. Pukul gula ngan butter smpi sebati
  2. Masukkan telur ngan esen vanila, pukul lagi
  3. Masukkan tepung sikit demi sikit dan uli ngan tangan smpi jadi doh
  4. Sapu acuan dengan butter (utk. takmau bagi melekat)
  5. Tekan dalam acuan tart senipis yang boleh..takut nanti kembang dia naik sbb ada telur
  6. Cucuk2 dgn fork sbb nak bagi dia kurang mengembang
  7. Bakaq 5 minit, then tuang filling dia, bakaq lagi sampai masak (sampai filling dia keras tapi tak hangus..hahahahaa)
  8. Biaq sejuk pastu nanti boleh laa kluarkan dari acuan dia...dan.........makannn.....
* ada jugak terbaca, lepas tekan doh dalam acuan terus tuang filling and bakaq skali harung jaa..for the first attempt niii tak try laa pulak..

Untuk buat filling dia lagi laa senang..part ni aku suka....campur semua bahan..pukul sampai sebati..maka jadik laa dia...mudah kann...aku suka yg mudah2 dan senang...memang dasar pemalas!!

So peeps...chill out your mind and have fun to bake.. :-)
See ya...

Cheers ;-)


Friday, October 7, 2011

Puding Custard with Tropical Fruits Cocktail

I had once made kind of this appetizers a long time ago but that one was from Auntie Rose recipe and advise..And by the way this time around, I've tried to turn it out to be as my own way and recipe of preparing it..bunyi macam hebat sangat bagus jaa kann... :-P Well, anything that been done need to be immortalized..kalau tidak nanti lupa esok2 nak buat lagik..!! Find the sketch of it last two days here...

 Puding Custard with Tropical Fruits Cocktail

The ingredients :
*************
1 can of evaporated milk/creamer
1 can of cocktail
20g halal gelatin ( I used gelatin from HalaGel)
1/2 cup of sugar
2 tbs of custard powder (stir in 1/2 cup of warm water before pour)

Preparation Instruction:
******************
  • Boil milk/creamer with sugar over the medium heat while stirring them non-stop.
  • Stir custard powder with warm water in some other container and pour into the milk boiled earlier..the same goes with gelatin..stir gelatin with hot water until well dissolved then pour into the mixture..
  • Stir until well blended then put in the fruits cocktail.
  • When the mixture looks almost boiling, turn off the stove and pour into container.
  • Let it to cool in the room temperature before placing in the fridge for a whole night.
  • Serve with your choice of decoration...yang ni aku buat sesuka hati jaa asal ada.. ;-)
Ok dearies....till here and hopefully to see ya again in the next story..
May you all will have a pleasant weekend ahead..

Cheers ;-)


Guess What

Peeps..guess what am I going to do with all this stuff..ahaks...


Don't missed out to the appearance of them laterr....My first ever attempt to this simple thing...Tak tau laa apa yang akan jadi...tak pernah lagii nih..Wish myself a very good luck..hihihii... :-D


Thursday, September 29, 2011

Cuba Teka

Heeiyyaa peeps..guess what am I going to do with all these stuffs...??? Yesss....the feel of baking is coming over again and again...And see what I got for this time around baking passion...


They are all for my crave these few weeks...Sorry hubby..I just can't stand without looking at it only and I bet that you too can't stand driving your wifey to SR to get even a piece of them..

And now..disebabkan tergedik-gedik kemaruk sangat nak makan 'chiskek'..therefore I made up my mind to bake it on my own...

Nii laah rupa dia a second before been posted into the oven...
Terribly nervous since this is my very first attempt of baking this my mouth watering food....hhhsssssspppp...!!!!

Don't forgot to catch up for the updates of it later and later since it is now on baking in the oven...
Tunggu....See ya... :-)

Cheers ;-)


Thursday, September 22, 2011

Daging 'Congo'

Don't ask me what is that 'Congo' means as I will have no answer for it..Since the recipe named to be that way..so I just say it that way too and yet I love to share out of what I get..Ilmu nii kalau dikongsi dan jadi amalan..kat situ kita dapat pahala..wallahua'lam...


OK..jom kita tengok camna nak buat..Since I am sooooo lazy to write..here I go and copy the ingredients and instruction from tuan punya petua.. :-) that been text to my FB inbox...love you Mash..


Daging Congo in the making (pic from Hubby's HTC phone)
Since arahan said to pour into kuali, there fore I used kuali too..lughuih bendoi patuh kannn

Maka saya yang menurut perintah dan arahan di bawah nii..maka there you go the result of the outcome nunnnnn di bawah sana.. :-)

1) daging batang pinang 1kg
2) bawang besar 4-5 bijik hiris
3) halia hiris halus2 supaya org gigit tak maki dlm hati hahaha
4) kicap cap kipas udang kaler merah separuh botol besar (dah try pakai kicap lain tak jadik)
5) sos tiram suka hati
6) cili kering blender suka hati nak pedas menusuk kalbu ke jiwa ke
7) bawang goreng 3 suku paket besar


Mula2 gaul jer daging, bawang, halia, kicap, sos tiram, cili blender dlm bekas memana.. Pastu panaskan minyak dlm kuali, tuang jer semua dlm tu.. Biar kejap nampak cam dah menggelegak tepi tu, tambah air skek.. Pastu rasa cam dah menggelegak banyak skek, tuang bawang goreng yg dah diblend.. Agak2 laa nak berkuah ke nak kering ke.. Dah menggelegak blurp blurp, tutup api..


Daging Congo ready to be serve.. :-)

Sangat laa 'congo' rupa dia..hopefully after this I knew where to adjust the amount of the ingredients to suit our own taste..Yang ni aku rasa mcm terlebih kicap kut..sebab memang ikut sebijik-sebijik arahan di atas..but the tast was not that bad when Mr. Hubby could finished almost half of sebatang lemang...layannnn...

And this is the complement of it.. :-)

Been craving for this lemang for this whole week, only today I managed to get it...
pakcik tuu betoi2 buat haku angaukan lemang tau!

OK...till then..for further inquiries and tips..you may wanna ask Cik Puan Mashitah @ ArE_sHiE's home sweet home..

Have a nice moment and happy cooking..
Cheers ;-)


My Puding Caramel

I don't know why this lately I had a kind of a good behavior of being a women..a wife and a mom..I meant trying to cook something new in cooking skills as well as baking... ~toingggg!!!~

Back to the last few days story, it was all of sudden I had came across with this business matter...and yesterday I was called to try on this Caramel Puding..Thanks a bunch to Alea Nora a.k.a Sha for her kindness sharing the recipe to me...

Although this is my first ever trial on baking this caramel, I bet it came with the good result at least I could stand to satisfied and happy with all the positives comments and feedback from friends..thanks friends for all the complimentary.. :-)
Alamak...Mr. Hubby kata macam rupa roti sapu kayaa jaaa..
Ambik laa kut angle lain bagi cantik sket..my little weakness in photoG

My promises, here I share the story-morry on how to make it..As usual, all are super simple ingredients and instruction that I always like...dah nama pon malas tak rajin kannnn..tapi nak try buat jugak. ;-)

The ingredients:
Ingredients A
150 g (~6-7 table spoon) of sugar
1/2 cup of water

Ingredients B
7-8 pcs of gred A eggs
3 table spoon of sugar
1 table spoon of vanilla essence
1 can of evaporated milk ( i used Carnation)

The cooking instruction:

  • Heat the sugar in the pan until the color turns to golden brown and pour the water. Stir them well then pour all into a tray. I used a small size tray which is around 7"x7"x3" in size.
  • Blend well all the B ingredients until smooth and pour them all into tray containing the sugar mixture and steam for 30-40 minutes.
  • After that, let the caramel to cool before pouring it into the dish to be serve.
  • Simple..?? No..?? And the outcome...........................................tada....!!!!!
.............
.............
.............
.............

.............
.............
.............
.............
.............
.............
.............
.............
.............
.............
.............
.............
.............
.............
.............
.............
.............
.............
.............
.............
.............
.............
.............
.............
.............
.............
.............
.............
.............
.............
.............
.............
.............
.............
.............
.............
.............
.............
.............
.............
.............
.............
.............
.............
.............
.............
.............
.............
.............
.............
.............
.............
.............
.............
.............
.............
.............
.............
.............
.............
.............
.............
.............
.............
.............
.............
.............
.............
.............
.............
.............
.............
.............
Small the pieces..yummy yumm yummm... ;-)
My first attempt at it..seems perfect..no..??

And yet I feel sooooooo bad for not learning on how to bake this earlier as it's extermely easy and simple...whereas I am actually good at this..~wink wink~ muahahahahhaaa... ~penyakit perasan sudah mari~

And today..see I got what after craving it for this whole week..And hari ni nak cuba masak daging congo resipi dari ArE-sHiE's pulak..Wish me luck yeah..!!

Till then and happy baking...
Cheers ;-)


Wednesday, September 21, 2011

Sweet Sour Layer Cake

Before I get forget to eternalize this piece of excerpt for my own future references and sharing as well as for all of us, I would better do it now as since over the past few days there were so many things that came and postpone the desire to do so...

Tak dak apa..cuma nak kongsi pengalaman of doing things during my bored free time. I had end up my mind last week during the holiday with this story and here you go the result...I had once made this steamed layer cake some long time ago but too bad I forgot to write on the recipe here and now I got it immortalized..


Skrg jom kita blajaq camna nak buat as this is kind of my trial again to bake it since my last time baking it when I was performing my teaching practicum in October 2009. Jom jom jom tengok...


Bahan-bahan:
Buttercup
1/2 cawan gula (kisar halus)
1/2 tin susu pekat manis
6 biji telur gred A
1 1/2 cawan biskut cream cracker (kisar halus mcm tepung)
Asam manis ( yang macam syiling tuu )
1 sudu teh Esen vanila
Pewarna


Cara menyediakan:

  • Pukul buttercup dengan gula sampai sebati
  • Masukkan telur satu per satu dan pukul hingga sebati
  • Masukkan esen vanila dan tuangkan susu pekat, pukul perlahan hingga sebati
  • Masukkan biskut crema cracker yang telah dikisar halus tadi, dan kacau perlahan-lahan hingga semua adunan bercampur rata
  • Asingkan kepada 3 atau 4 bahagian (bergantung kepada berapa warna lapisan yang diingini) dan warnakan setiap satu
  • Sapukan loyang pembakar dengan butter dan mulakan melapis lapisan yang pertama. Susun asam manis dan kukus selama 15 minit.
  • Teruskan dengan lapisan yang kedua dan seterusnya berselang seli warna dan susun asam manis seperti di langkah (6) (Lapis yang dah dikukus dan di susun dengan asam manis)
  • Dah selesai kukus, sejukkan kek sebelum dipotong

Till then, and have a nice baking moment..
Cheers ;-)


Wednesday, September 14, 2011

Lontong ala Jawa Resepi Mak

Hari ni nak mengabadikan resipi turun-temurun rendang mak yang selama nii tolong pesiang-pesiang and potong-potong bahan nak masak jaa..tolong makan and tolong kemas..tapi this year around punya raya kena masak sendiri sebab kena beraya di rumah MIL..


It's indeed simple dish to be prepare and here I share it to all..Dengan izin mak..ahaks..jom kita tengok bahan-bahan dan camna nak masak...tobat senang nak buat..sungguh tak tipu..! :-D

Mintak mahap laa noo..amik pic teruih dari periuk..muahahahaa.. :-D
ni kira in the mids laa..sementara nak masukkan santan pekat, su'un and tahu kering...

Bahab-bahan:
- Bawang merah & bawang putih (tumbuk halus)
- Ikan bilis (tumbuk halus)
- Udang
- Lengkuas (hiris)
- Kunyit Hidup (tumbuk halus)
- Santan
- Carrot (potong dadu)
- Kacang panjang (potong 1")
- Tempe (potong dadu)
- Kentang (potong dadu)
- Su'un & tahu kering 
- Tahu basah (potong dadu)
- cili hidup & cili api (hiris)
- Asam keping


Camna nak sediakan?
Sebenarnya nak sediakan / masak tuu senang jaa..semua tuu rebus jaa ngan santan..then sambil laa kacau2 sebab tak mau bagi santan tuu berbiji2..then nak masak bahan2 cam carrot semua tuu..ikut laa mana yg cepat lembut tuu..masuk laa lambat sikit..okeyh..aci tak instruction yang macam gini..kalau nak tanya apa2..leh laa leave comment and your link kat sini..nanti kita reply yep..hihi..


Happy cooking!

Cheers;


Sunday, August 28, 2011

Tart Gulung (Tart Nenas)

Alamak..kenapa boleh lupa nak cerita pasal tart nenas / tart gulung yang aku buat sendiri tahun nii erh..sebabb selama nii tart gulung kakak aku yang adun..aku tukang gumpal jem nenas and bakaq jaa..but this year punya cerita tart gulung adalah dari adunan tangan sendiri..and well...still not that bad..the kids and the adults were seems could not stop themselves to come and go having it..kagumm gituhhh..


TART GULUNG a.k.a TART NENAS comel


Gilaaa...!!! macam tak percaya tahun ni semua cookies aku buat sendiri..but boleh laa sementara ada yang nak membantu sikit2..tak dak laa bosan sgt aku duk sorang2 kat dapoq tuu baking for all alone..but tahun depan klu dipanjangkan umur and dimurahkan rezeki masuk rumah baru..with full of hopes..boys boley laa present with all their piling keen and kindness to help..ahaks..

And by the way, below are the ingredients and way how to prepare it:

Inti:
- Nenas (2 biji saiz sederhana diparut)
- Gula (as how you wish your jam to be sweet)
- 1/2 sudu teh cuka masak
- 2 kuntum bunga cengkih
- sedikit kayu manis
- 1 sudu teh esen vanila
(masak nenas yang dah diparut sambil dikacau sampai kering air..kemudian masukkan semua bahan-bahan lain dan kacau lagi hingga jem pekat..gunakan api sederhana sebab kalau api kuat nanti jem cepat hitam / hangus)


Doh:
250g tepung cookies
25g tepung jagung
30g tepung castard
25g tepung susu (optional, klu nak bole letak, klu xnak pun takpa)
250g butter
1 biji telur
1 sudu besar minyak sapi
1 sudu teh esen vanila
1 sudu besar gula - (untuk doh saya tak letak gula sebab jem dah manis  (menu sihat laa konon-konon)


- kuning telur utk hiasan


Cara nak buat:-

  1. Pukul gula dan butter hingga sebati. Masukkan telur dan esen vanila dan pukul lagi sampai sebati
  2. Masukkan tepung-tepungan semua dengan minyak sapi then uli
  3. Tekan dengan acuan, letak jem then gulung
  4. Masukkan dalam dulang pembakar then bakar dalam oven pada suhu 160 darjah selama 15 minit atau sampai masak laa erh..
  5. Setelah masak, kluarkan dan sapu kuning telur cepat2 masa tart tengah panas lagi..ada orang sapu masa sblm bakar..ikut laa mana2 u all suka..
  6. Biarkan sejuk dan bole laa disimpan dalam bekas or dalam perut.. :-)
Selamat mencuba
Happy baking moms and gurls out there..
Cheers ;-)


Marble Shortbread

OK then..finally I had made up my time to upload this to share with you guys..
My first attempt on baking this ever..
But all in all, it's simply simple cookies that I had never thought before..
And what was the most simple that came to my mind was..it is super duper yummy and I only managed to buy it..therefore it's came to the very simple that I can do..hahaha..org utara kata baloq 'pe-nye-gan'..


Here you go the look of it and so sorry since saya budak baru belajaq kann...please excuse me with all the messiness cuts on it and the presentation..lepaih nii konfem haku buat yang paling cun punyaa lahh :-D


Marble Shortbread versi Mummy's Stories

Well guys, it super simple task on making and baking it..you may wanna put your try on this yummylicious cookies..Here you may wan to find the way of makin' them.

Happy baking moms and gurls..
Cheers ;-)


Friday, August 26, 2011

My Marble Shortbread in the Making

My very first attempt with this cookies of my fave..Selama ni asyik beli jaa..so this year around,  as my wish to celebrate the hari raya with all my hand made cookies, it's finally come to real.. :-)

Here we go with the base ingredients:
- 120g cookies flour
- 50g of castor sugar mix with brown sugar
- 40g of fine almond
- 100g of butter (melt)
- 45g milk powder

Topping:
- 200g of bar cooking chocolate + choc shine
- 65g of white choc + choc shine

How to prepare:
- mix all the base ingredients and  knead them gently until it perform into dough
- press them into the brass with cutter and prick with a fork
- bake in the oven at 180 degrees for 15 minutes
- once well cooked, take them out and press the cutter to cut them into pieces then take the cutter out


- melt the cooking chocolate with the choc shine. Use either to double boil or melt them in the microwave (- easier) for 90 seconds. Same goes with the white chocolate


- pour the chocolate onto the base.
- and align evenly to cover all the base


- Piping the white chocolate on it. The decoration can go as how you like


- use a stick to strike out the topping chocolate to produce the decoration. You  may want to decorate the marble pattern spirally

- put back the cutter and keep into the fridge for 15 minutes to harden the chocolate.
- Then take them out, pull out the cutter carefully to prevent broken to the cookies

That is all...Quite a simple and easy way to perform..
Wait for the next update for the ready of it
Happy Cooking

Cheers ;-)


Wednesday, August 24, 2011

Biskut Makmur Resepi Tradisi

Nothing much to blog about but no but here I am generously share the family's tradition Makmur recipe. Since I have been so tight in schedule, let me put some of my little free gap to share this with you guys..

Biskut Makmur

Ingredients for the dough :
- 300g cookies flour 
- 300g ghee oil (as necessary)
- 150g margarine
- 1 pc of egg

Ingredients for the core (mix):
- peanuts (baked & finely mashed)
- sesame seeds
- sugar

- Powdered sugar (for coated)

Steps how to make:

  1. Melt the ghee
  2. While the ghee been left for melting, break the egg and stir with the margarine until well blended
  3. Pour the flour and the melted ghee, mix them all well. Make sure the dough are not too soft or too hard, therefore it would be easier to be malleable.
  4. Shape into a round shape and put the core
  5. Bake them with 180 degrees for about 10-15 minutes.
  6. Once cooked, roll them in powdered sugar
  7.  Ready


Tuesday, August 16, 2011

1st One for Warming Up ~Peanut MazoLa Cookies~

Dalam duk bz dan kemalasan serta keletihan yang berganda-gan da nih..akhirnya siap jugak cookies pertama haku untuk raya nii..


And introducing the turun-temurun recipe from nenek moyang atok nenek kitorg dolu-dolu..so now being passed down to me dan ini lah hasilnya...


Biskut Mazola Kacang

No secret recipe, NO special ingredients, NO extraordinary tips to bake this up..Super duper simple..As I am yang agak malas kurang rajin nii..suka yang all the simple one..

Bahan-2:
600g Kacang Tanah (goreng and blend halus)
400g tepung gandum
Gula (ikut suka nak letak banyak mana, nak manis letak banyak, nak sedang2, agak2 laa..rasa laa doh tuu nak setakat mana)
Mazola Oil (nak guna utk uli..pon main agak2 tuang..boleh gitu..??)

Baking Steps:
Memula, mix all the peanuts, tepung, gula then gaul laa sampai serata...baru tuang minyak Mazola..
After all uli laa sampai doh tuu boley dibentuk sesuka hati rupa apa..I like the basic look..legend..

Bake them into the oven with the temperature of 180 degrees for about 10-15 minutes..dah siap... :-)

Simple..??Have fun on baking...
Till then..see ya in the next entry which I sure all about the cookies again ;-)
I wish to make real for my very 1st attempt baking the shortbread for raya this year...TUNGGUUUU...!!!

Cheers :-)


Friday, March 18, 2011

Aku pun Taktau

Actually aku pun taktau nak namakan menu nii dengan nama apa..yang pastinyaa memang aku mereka-reka jaa asal jadi...but tak sangka rasa dia sedap...hihihiii...

Bahan-bahan dia semua yang simple simple belaka..seems more to vege but still there are some shrimp being added in since they are the boys' fave..

  • Shrimps
  • Fish ball
  • Carrots
  • Capsicums
  • Curly flowers
  • Garlics
  • Onions
  • Ginger
  • White egg
  • parsley + leek (tiny cut)
  • cornflour (to thicken the gravy)
Well...have a good try and happy cooking... :-)

Cheers ;-)


Monday, January 24, 2011

Mussels ~ Love It To The Bits

Last weekend was the most enjoyable moment as I could cook the most fave meal. It's been so long we had never had this mussels..

There was a boy came and drop by to my house sell them..Boleh tahan jugak laa mahalnyaa mak cakap..Well craving punya pasal..it still make me full of excited :-)

Here it is after been  turned into a tempting dish..yummy-gummy-liciousshh I tell u...hmmm

Jom layan resipi camna nak memasak plak erk..
The ingredients:
Mussels (1kg) - boiled and peel off from the shell
* Onion
* Garlic
* Ginger
Lemongrass
Lime leaves
2 table spoon of chillies
2 table spoon of Thai chillies sauce
2 table spoon of oyster sauce
half of tomyam cube
Carrots, leek and parsley for decoration :-)

How to cook..?? here you go the steps:

  • Mashed all the (*) ingredients and saute them all
  • Toss in the Lemongrass and the lime leaves
  • pour all types all listed sauce and that half of tom yam cube and carrots
  • put in some water, a tea spoon of salt and a pinch of seasoning powder
  • pour n all the mussels and simmer them all until cooked
  • Finally, put in all the tiny leek and parsley and then they are ready to be served..


Happy cooking dear..
Cheers,


Wednesday, December 8, 2010

Golden Fried Potato

Me myself was not sure how I could turned out with this kind of recipe..It was all about the idea on trying something new no treat my little boy that been choosy and choosy day to day. And so, hasil dari merepek-repek plus with the lazy-bum of me in cooking these lately, here the meal that turned out..I named it as Golden Fried Potato..
This is upon the 1st try..OK but not bad..The little one love it so bad.. :-) mesti dalam hati dia berkata-kata.."bleh tahan gak walaupon mummy haku merepek.." weee...

And this one is upon the second attempt..as per requested from Mr. Hubby yang nak tumpang sekaki, therefore there were some anchovies been interspersed on the side..hihi..

While this is the 3rd attempt, and this time around, the onion that been fried with oyster sauce were never been mixed together, therefore it looks a little bit more dried and no anchovies for this time. This one special made for little boy..hukhuks..

So dear..puas makan potato hari-hari..??
And anyone would wanna put some try on this, here you go the super simple dimple the way to cook, but perhaps you guys wont turn lazy as I do yer.. :-D

  • potatoes, cut into wedges
  • marinate them with turmeric powder and a pinch of salt for 5-10 minutes
  • fry them until they turned golden
  • then saute the onion, put a table spoon of oyster sauce, mix them together
  • fried until about 5 minutes then pour all the fried potatoes together
  • put a bit of daun bawang and daun sup that been cut into tiny pieces 
  • Stir them evenly and they are now ready to be served

Mudah..?? Senang..?? Yesss...you may want to try for your little one..buat jajan pon sodapp..!!
Happy cooking all dear..

Cheers;